
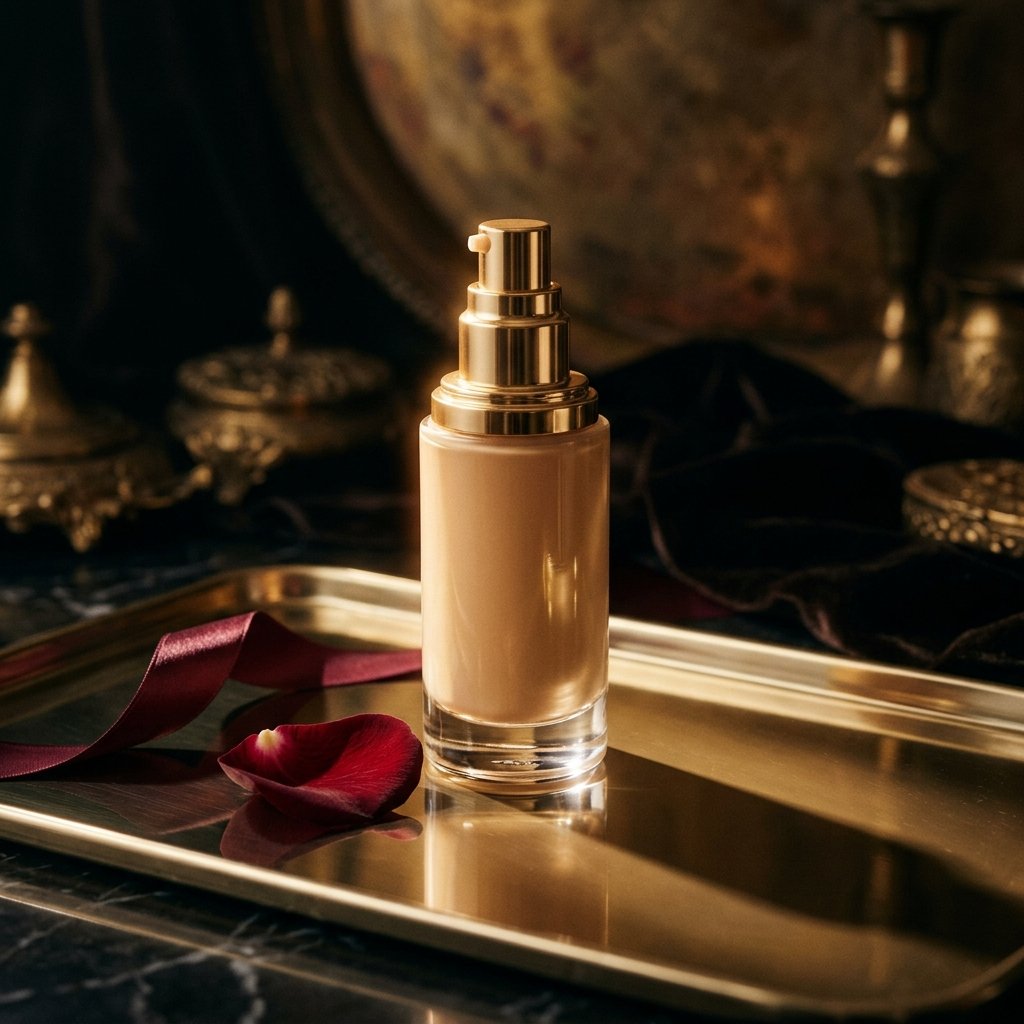
For years, my foundation never quite looked right. It either sat on my face looking cakey and obvious, or it slid off by lunchtime, or it clung to dry patches I didn’t know I had. I blamed the product, then my skin, then the weather — when the real problem was my technique. When I finally learned how to apply foundation properly, everything changed. Suddenly my skin looked like my skin, only better.
This guide walks you through foundation application the right way, step by step. We’ll cover prepping your skin, choosing the right formula and shade, applying it with the right tools, and avoiding the mistakes that make foundation look heavy or patchy. By the end, you’ll be able to achieve a natural, skin-like finish every single time — whether you’re going for light coverage or something a little more full.
It’s easy to think that the secret to flawless foundation is buying an expensive bottle. That’s only half the story. The truth is that the same foundation can look amazing on one person and terrible on another, and the difference is almost always in the application — the preparation, the tools, and the technique. Two people can use the exact same product and get entirely different results, purely because of how they put it on.
Good foundation application starts before a drop of product touches your face. If your skin isn’t prepped, if your shade is wrong, or if you’re using the wrong tools for your formula, no product on the shelf will save you. On the flip side, when you get the technique right, even an affordable drugstore foundation can look like a professional makeup-artist finish. That’s why learning the method matters so much — it’s the difference between foundation that looks like a mask and foundation that looks like naturally perfect skin.
Step 1: Start With Clean, Moisturized, and Primed Skin
The very first step of flawless foundation application is preparation, and it happens before the foundation ever comes out. Foundation sits on top of your skin, so whatever is underneath it — dirt, oil, dry patches, or leftover skincare — will show through no matter how well you blend.
Cleanse first. Start with a clean face. Remove any leftover makeup, dirt, or oil from the day, so your foundation has a smooth, clean canvas to grip. This matters more than people realize, because foundation applied over leftover residue clings unevenly, slides around, and looks patchy by the afternoon. For a full breakdown of getting your face properly clean, check out our step-by-step guide to removing makeup gently.
Moisturize and prime. Apply a moisturizer suited to your skin type, and give it a minute or two to sink in before anything else. Well-hydrated skin holds foundation more smoothly and prevents it from clinging to dry patches. Then — if it’s part of your routine — apply a primer. A primer smooths the surface, fills in the look of pores and fine lines, and helps your foundation last longer and apply more evenly. Hydrated, prepped skin is the foundation of good foundation application, literally and figuratively.
Step 2: Choose the Right Shade — And Always Check It in Natural Light
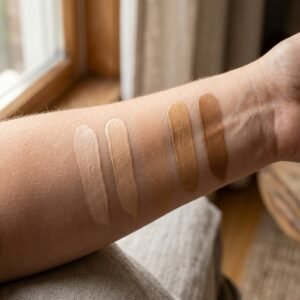
A perfect foundation application starts with a perfect match, and choosing the wrong shade is the single most obvious mistake you can make. A shade that’s too light leaves a ghostly pale cast; one that’s too dark creates an obvious line at your jaw. Either way, no amount of blending will fix a shade that simply doesn’t belong on your skin.
How to match: Test foundation along your jawline and down your neck, not on the back of your hand. The skin on your hand is a different shade and texture from your face, so it gives you a misleading result. Instead, blend a little along your jaw and down the top of your neck, and step back. The goal is a shade that disappears into your skin — if you can’t see where your face ends and your neck begins, it’s a good match.
Why natural light matters: Always check the shade in natural daylight before committing, because indoor lighting can be deceiving — warm bathroom bulbs can make a shade look lighter or darker than it truly is. Many people also find it helpful to pick a shade that matches their neck slightly rather than their face, so the transition looks seamless. If you’re between two shades, blending or mixing them slightly is often the best route to a spot-on match.
Step 3: Choose the Right Formula for Your Skin Type

The formula you choose affects everything about your finish, so match it to your skin type and your coverage goal. Formula and technique go hand in hand in foundation application — the best technique in the world can’t make the wrong formula flatter your skin.
For dry skin: A hydrating, luminous, or dewy foundation adds moisture and a healthy glow, and avoids clinging to dry patches. Cream or liquid formulas are typically a great fit, and a damping sponge helps them melt into the skin.
For oily skin: A matte or oil-free foundation helps control shine and stay put for longer. Powder or matte liquid options work well, and finishing with a light powder in the T-zone keeps things fresh.
For combination or normal skin: A satin-finish foundation that sits between dewy and matte is usually the most forgiving and versatile choice, giving you a balanced, natural look.
The coverage level also matters — light and medium coverage feels more natural and is easier to blend, while full coverage requires more care to avoid cakiness. If you’re new to this, a light or medium buildable formula is the most forgiving place to start.
Step 4: Apply in Thin Layers, Starting From the Center
Here’s the golden rule of natural foundation application: start with less than you think you need, and build up slowly in thin layers. It’s much easier to add more product than it is to take it away, and loading up a heavy layer all at once is the fastest route to a cakey, mask-like finish that ages you and looks obviously done.
The technique: Start in the center of your face — where you have the most redness, blemishes, and unevenness — and blend outward toward your hairline and jaw. This “center-out” method means the fullest coverage sits where you need it most, and it naturally fades to almost nothing at your edges, which keeps the whole look going natural and avoids that obvious “foundation line.”
Why it works: Thin, buildable layers let your skin peek through, which is exactly what makes foundation look like skin rather than a mask. Two or three light layers will give you beautiful, even coverage that still looks like you. Patience here is everything — rushing and applying too much at once is the single most common foundation application mistake.
Step 5: Use the Right Tools — and Know That Your Hands Count

The tools you use play a huge role in the finish, and there’s no single “right” answer — it depends on your formula and the effect you want. Different tools produce different results, and knowing which to reach for is part of mastering foundation application.
Foundation brush: A flat or buffing brush gives more coverage and a slightly more polished finish. Work the foundation in with small circular or stippling motions to avoid streaks, and keep the brush clean — a dirty brush causes patchiness and can harbor bacteria.
Beauty sponge: A damp beauty sponge (dabbed, never dragged) gives a soft, airbrushed, skin-like finish, and is forgiving for beginners. Dampen it and squeeze out the excess water first — this keeps it from drinking up too much product and gives that gorgeous, blended, skin-like texture. Bounce it gently rather than swiping.
Your hands: Clean fingers are genuinely a great option. The warmth of your hands helps foundation melt into the skin for a very natural, seamless finish, and you don’t need any extra tools — perfect when you’re traveling or in a hurry.
Whichever you choose, the key is gentle, blended motion — never leave harsh edges or visible lines.
Step 6: Blend Down Your Neck for a Seamless Transition
A foundation application isn’t finished at your jawline. Your face and neck are often slightly different shades, and if the foundation stops abruptly at the jaw, the difference is immediately obvious to anyone looking at you. Blending down slightly into your neck — just a little, where your jaw meets your neck — softens that line and makes the whole look more cohesive and natural.
If you matched your shade to your neck in Step 2, this transition should be easy. A quick blend over the jaw and the top of the neck is all you need for a seamless finish. Don’t forget your ears — a common spot everyone forgets — and a light sweep over your neck keeps everything uniform.
Step 7: Set It Lightly So It Stays Put Without Looking Powdery

Setting your foundation helps it last longer and keeps it from transferring or sliding, but it’s easy to go overboard and end up with a dry, powdery finish that makes your skin look older and flat.
The technique: If you want a natural look, use a light dusting of translucent setting powder, focused on the areas where you get oiliest — usually the T-zone: your forehead, nose, and chin. Keep the powder away from your cheeks and the edges of your face, where a little glow looks healthy and natural. Alternatively, a setting spray can lock everything in without any powdery effect at all. The American Academy of Dermatology recommends being gentle with your skin throughout your routine, and that includes how heavily you powder down your face.
Why it matters: The right amount of setting adds longevity without sacrificing the natural finish you’ve worked to create. Too much powder is one of the most common foundation application mistakes, because it immediately makes skin look dry and cakey.
Step 8: Finish With a Touch of Product for Dimension
A super-flat, one-tone face isn’t actually natural — real skin has dimension, with highlights and shadows, and spots where color is naturally rosier. Once your foundation is blended and set, you can bring back a little life so it doesn’t look flat or mask-like.
The technique: A subtle sweep of cream or powder blush on the apples of your cheeks, a light touch of bronzer where the sun naturally hits, and a small highlight on the tops of your cheekbones all restore dimension and make your skin look alive again. Keep it light and blend well — the goal is a healthy, radiant look, not stripes or heavy contour. Less is more here, especially when you’re going for a “your skin but better” finish.
The Foundation Application Mistakes to Avoid
Beyond the steps above, these are the habits that quietly turn good products into a bad finish — and they’re all fixable once you know what you’re looking for:
Applying too much at once. Start thin and build. Too much product at once is the number one cause of cakiness. A single generous pass turns into a heavy, obvious layer that’s impossible to blend away.
Skipping skin prep. Foundation on dry, flaky, or oily, unprepared skin will never look its best. Prep is not optional — it’s part of the application. Even a minute of moisturizing changes how your foundation looks.
Using the wrong shade. A beautiful application in the wrong shade is still a mistake. Always match to your neck in natural light, and don’t trust bathroom lighting.
Rubbing instead of blending. Harsh dragging or rubbing creates streaks and friction, and it can lift away the foundation in patches. Use gentle dabbing, stippling, or circular buffing motions instead.
Forgetting to blend the jaw and neck. An obvious line at your jaw instantly ruins the natural effect, no matter how perfect the rest of your application is.
Powdering too heavily. A heavy dusting of powder turns healthy skin into a dry, flat mask. Use a light hand and focus on the T-zone, and let the rest of your face keep its natural glow.
How to Make Your Foundation Last All Day
Even a perfect foundation application won’t survive the day without a few extra steps, so here’s how to make it last. Start with a primer suited to your skin type — it gives the foundation something to grip and controls oil or adds moisture as needed. Layer your products thinly, making sure each one absorbs before you add the next, so you never end up with a thick, sliding mess. Set with a light dusting of powder in your T-zone, then finish with a setting spray for extra hold.
Through the day, blot rather than pile on more product. Gently pressing a blotting paper or tissue over oily spots keeps your look fresh without smearing your foundation — piling more powder on top of oil just turns everything into a cakey patch. Keep a small kit of blotting paper and a bit of setting spray in your bag, and your carefully applied foundation will stay fresh from morning to night.
The Bottom Line

A natural, skin-like foundation finish is absolutely achievable with the right technique, no matter your budget. The essentials are simple: prep your skin, match your shade and formula, apply in thin layers from the center of your face, blend seamlessly down your neck, and set lightly.
Mastering foundation application is a skill that pays off every single time you wear makeup. It takes a little practice, but once you understand the method — prep, the right tools, thin layers, and gentle blending — you’ll never struggle with cakey or patchy foundation again. Your skin will look like your skin, only better, and that’s the whole point.